Editing An Image On A Static Page
z
A) Click on Website in the Black bar.
B) Roll over Pages in the Grey bar.
C) Click on the link View Static Text & Images.
D) This is the Page of Pages. You will see a list of the pages within the site.
E) Click on the name of the page you wish to edit, for example, 'About Us'.
F) The page will open up to show a list of the Text, Images and Modules on the page. If an item in the list is an image, it will show a very small thumbnail of the image. If it is empty it will show a little box representing an image.
G) To edit an Image Tag click on its title in the list.
H) These are the fields that can be used.
- Sort Number - The order the Image shows alongside other content on the page.
- Page - The page on which the image shows.
- Tag Title - The title of the image within the administration area.
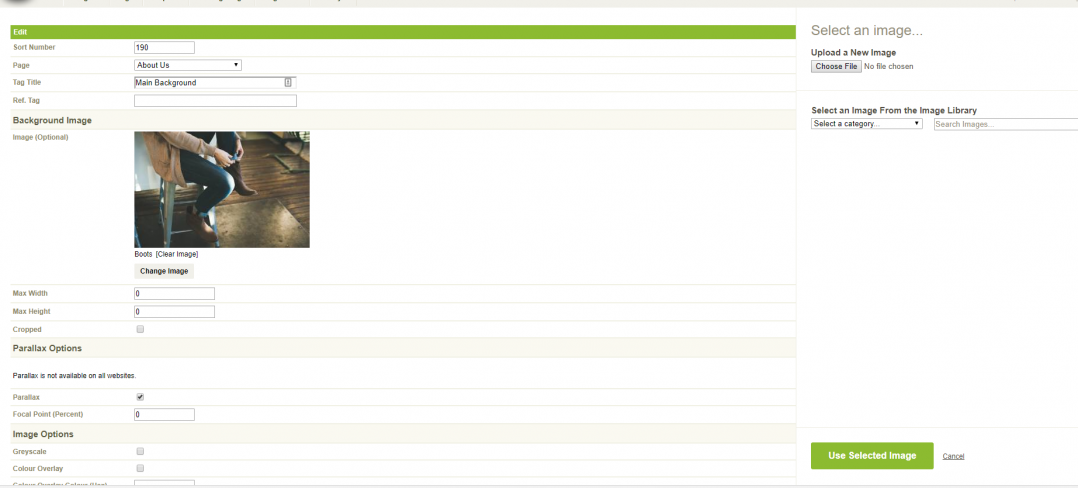
- Images - There are two ways of choosing images, firstly from the library or secondly by uploading. You can do one or the other, NOT both. Please click on Select an Image to get started.
A new panel will open up on the right hand side of the screen. You have the option to either upload from your desktop or from the Image Library.
Option1 – Upload A New Image
1) Click on the browse button.
2) Navigate to your prepared image.
3) Once you have found it click the open button.
4) The system will upload the new image and show it in the panel.
Option 2 – Use Image From Image Library
1) From the dropdown list select the category of images. The thumbnails of uploaded images will then show.
2) Click on the image title you wish to use. It will go bold.
3) You can either browse all uploaded images or search for it via Filename.
4) Click on Use Selected Image button.
- Link (Optional) - You can add a link to another part of the site, or another site here.
- Max Width - The maximum width of the image (the height will auto adjust to keep proportion).
- Max Height - The maximum height of the image (the width will auto adjust to keep proportion).
- Cropped - The image will be cropped from the centre to the dimensions above. You must enter both dimensions if you want it cropped.
- Image Position - You can choose to put the image to the left, right or centre. The text on the page will wrap around the image depending on the sort number, the amount of text and the position. Text will not wrap around centred images.
- Image Description - This will show below the image when it shows on the public page.
- Image Alt - This is the text that will show if for any reason the person has images turned off in their browser. These should contain information about the content of the image. Some mobile phone browsers stop images downloading initially to save bandwidth.
- Use In - The area of the site this image is to show in. Please note if you use images in the side of the site they will not be shown any larger than the width of this area. They can be narrower, but not larger, this is to retain the site style.
I) Click the Edit button at the bottom of the webpage.
J) Go to the public area of the site and review your edit.