Home Page - Image Boxes
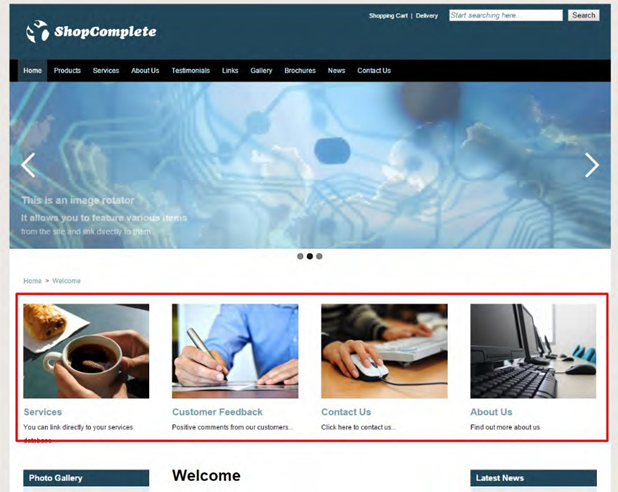
The Image Box system is a powerful and flexible way to direct people from your home page to any other area of the website.
They can be added to so you can create a useful directory of easy to follow links.
The use of the right images can attract the eye and help you to guide your viewers to the page you want them to see. You will see image boxes used not only in the majority of our sites, but now you know what they are you will see them used on almost every website you visit.
We have designed your Image Boxes within the context of your site. In the vast majority of cases you will not need to add to their number (although you can), you will edit the content and change the destination of the link.
Editing an Existing Box
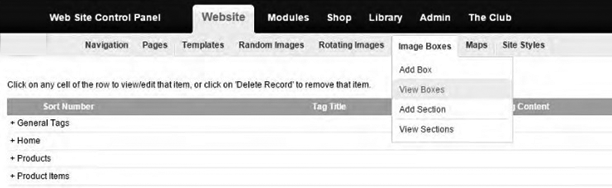
A) In the top Black Bar click Website.B) Roll your mouse over Image Boxes on the Grey Bar.
C) Click on View Boxes.
D) Click on the Title of the box you wish to edit
E) The entry will show on screen. The thing to bear in mind is that in your specific image boxes not all the Image Box Content elements may be used.
- Sort Number – The order the box will show in the grid.
- Title – This is only seen in the editing area.
- Section – If we have used this function in more than one place on your site (which we often do) you can select the section using the drop-down menu.
- Link URL – The page you wish the viewer to go when they click the link.
- Description – Generally this is the smallest size font on the displayed box. Keep it brief, but make it interesting.
- Image – Change the image by clicking on the button and following the usual ways to either upload or select an image.
- Show Online – This will determine if the box shows in the grid on the page.
F) When you have finished editing the entry click on the Edit button in the lower left-hand region of the screen.
G) Return to the public area of the site and review the change you have made.